Wednesday, November 30, 2011

Christmas Challenge Day #3: Meeting the man himself! Santa Clause!

I've always heard the third time is a charm...I tried taking Samuel to see Santa when he was about a month old...screaming.  I tried taking Samuel last year to see Santa when he was a year old...screaming.  But the third time is a charm!  By no means did the picture turn out great, in fact, Samuel wouldn't even sit on Santa's lap. But we did it!  We got a picture of both Samuel and Santa in the same general area, with no tears!

This was one of my favorite childhood traditions when I was a kid!  A visit with Santa.  There is just something magical about it!  As a parent, I want to be able to provide the same experience for my son.  And though, the picture was kind of funny/not the best.  The time we spent together was invaluable.

You can do a visit with Santa the standard way...at the mall.  Our local mall does photos with Santa at a high price, but they will let you take your own with your digital camera if you want.  Or you can get creative at seeing Santa. 

This year, we attended an outdoor tree lighting ceremony in our little town.  It was a great experience: caroling, lights, Christmas tree, a message, and loads of kids!  You can also see Santa at church functions, children playgroups, and community gatherings!  Ask other mom's in your area, and call your town hall to see if they offer any holiday events!  No need to spend a lot of money! 


Not a great picture...of any of us!  But a great night and great memories!!!!!  It was great quality time for the whole family (the husband took the picture!)

Christmas Challenge Day #2: Make your windows glow

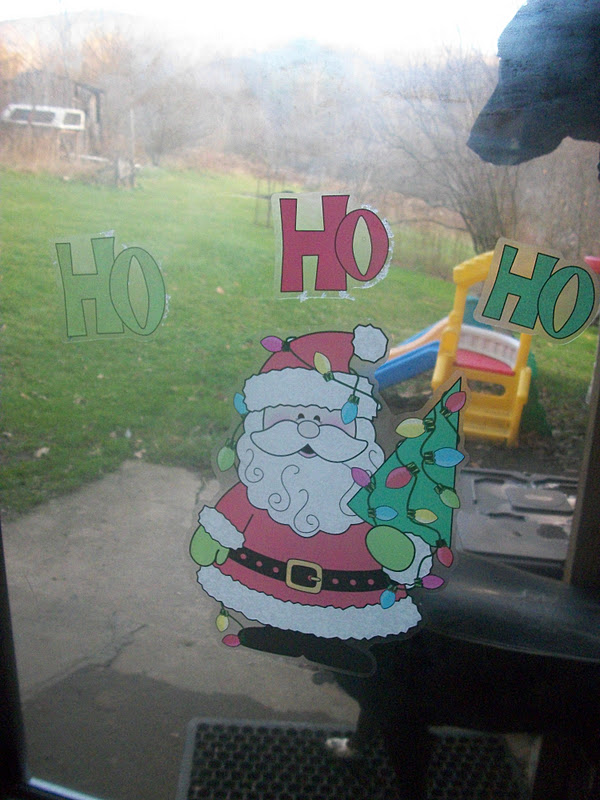
Samuel and I are spending the day decorating all the windows and doors!  It is a great activity to do with a 2-year old...and I'm sure the older the kiddos get that it gets even more entertaining! 

This is a fairly cheap activity, and may require a run to your local Wal-Mart or Target or Dollar Tree.  By my frugal standards, we went all out for window and door decoration day! We spent about $10!  We got a great assortment of the gel window clings, the regular window clings, and these great new window stickers that are removable! 

My pictures are certainly not the best, there is just something about taking pictures of windows that just never seems to work out for me!  But we have spent the entire morning having a ton of fun!  And it's the activity that just keeps on giving!

Samuel loves to pull off all the window clings and put them back on: over and over and over and over and over again!  I'm actually now questioning the gel window clings...they may be more appropriate for a child who is a bit older.  Samuel has already torn a couple of ours.  So if you are the mother of a toddler, maybe stick to the clings at the Dollar Tree.  It's only $1, so if they got lost or ruined, no big deal!  Plus, you can wipe them down in warm water and they are like new!  Also, let your child/children pick them out!  I picked out a Christmas tree I liked, Samuel liked the Santa Clause and the ornaments! 

We went all out and are decorating most of our windows.  But if you are on a tight budget, one will do!  It's something safe, fun, easy, and perfect for a toddler!  Plus it makes things look festive! And the sky is the limit on this!  This year we are doing just the simple clings, but next year I'm thinking of making snowflakes, decking them out with candles, and trimming the windows with bows!  Be creative and make your windows shine!


Monday, November 28, 2011

Christmas Challenge Day #1 Sparking Snow Dough

It is so easy during the holidays to get so wrapped up in everything, that it's easy to forget to take time out and enjoy that little love bug in your life!  So my challenge to any parent, it to make sure you carve out a half of hour of your morning or evening for just some one on one time!

I'm posting 24 fun things to do with your toddler during Christmas!  Some ideas are simple, some are free, some involve minor purchases...but all are great to do without going broke!!  You can do these ideas in any order and repeat when necessary!  But the time spent will be worth it!  Day #1: Sparking SNOW PLAYDOUGH!

SPARKLING SNOW DOUGH
2 cups water
2 cups flour
1 cup salt
4 tsp. cream of tartar
4 tsp. oil
Iridescent glitter (we used silver...but any color will work!)


1.  Combine ingredients in a heavy saucepan.
2.  Cook over medium heat, stirring constantly with wooden spoon- until mixture thickens and pulls away from sides of pan. 3.  Form dough into a ball, place on waxed paper and cool.

Recommendations:

Stoves and Samuel do not go well together!  Samuel loves to be a BIG helper!  But I always worry he will get burnt, so I made this during nap time for him to play with when he wakes up!  But if you are a parent of an older child, then this would be great to make together!

Here's the website where I found this recipe (and 39 other recipes for homemade playdough!!!)  If you don't have all these ingredients you can substitute another recipe and just add glitter!


24-Days of Christmas Fun!!!

As a child, I loved Christmas!!!  My siblings and I always had so much fun out of the simplest things!  As I got older, I lost some of that simple joy...but now that I have a 2-year old...IT'S BACK!!!!!!!!!  I am so excited to celebrate Christmas this year!!!!!  The past two years I was exhausted at Christmas time.  The year Samuel was born, I didn't even put up a tree...and last year, the tree made it up, and the gifts got wrapped, but anything more than that was daunting...but this year, I AM SO EXCITED!!!!!!

So, for others who have toddlers (my son is 2)...I plan to post 24 simple, and fun things you can do with your child.  One for each day leading up to Christmas!  I'm actually working ahead so I can post pictures!  So stay tuned (and Mel, I know you are a reader...just book mark this page so you and Lydia will have some fun ideas in a couple year!  In the mean time, be exhausted...you are allowed to!  You have an infant!!!)

Monday, October 31, 2011

Under the Sea!

As I mentioned before, my MOPS group made a busy box a few weeks ago!  I just ADORED the idea!  I'm not big on Samuel watching a lot of TV (though he does watch TV)...but he's also one of those kids who has tons of toys and just kind of doesn't play with them for very long or very often.  So between the MOPS busy box and some research on Pinterest (www.pinterest.com) I made a goal to create my own busy boxes for Samuel to enjoy!

One of the first boxes I was most excited about was an idea I came up with.  The theme is Under the Sea!

We just returned from a trip to the beach, and Samuel LOVED the beach...so what better busy box to make!!!

It was simple, quick, and inexpensive.

Here is a break down of items and costs of the busy box I made:

Rice= .64 (walmart)
Blue food coloring=already had this at home
Plastic underwater sea creatures=$1.00 (dollar tree)
Blue storage box=$1.00 (dollar tree)
2 books about the ocean=$1.00 for each (dollar tree)
Seashells=free from our recent beach trip, though I did see some at the dollar tree
Sand=free from our sand box
Photo album:$1 (Dollar Tree)
Large plastic bowl:$1 (Dollar Tree)
Old Set of Measuring Cups=I already had these, but they can be purchased for $1 as well at the dollar tree or Walmart

Total cost: approximately $6 after tax...it could cost you more or less depending what you have around the house!

So what did I do:

First I loved the sensory aspect of this!  So I put a bag of rice in a large Ziploc container with about 20 drops of blue food coloring and dyes our rice blue to represent the ocean!  Samuel LOVED this!  We put the rice in the large bowl and mixed in the sea creatures and sea shells!  He LOVES looking for the sea creatures and shells!  We also use this for sorting, separating the sea creatures from the sea shells.  And we use it to count sea shells.  This week Samuel has learned to count to 6!!!!  I really think this is partially from counting the sea shells OVER and OVER and OVER and OVER again!  But, this is also great because Samuel is so fascinated by the rice that he gladly plays with this on his own for an extended period of time (20 minutes yesterday!).  This allowed me to make a couple phone calls and sort the laundry!!!  So it's a great activity either on their own or with a family member (please note, if your child is very young, then I probably wouldn't let them do this activity unattended since these items could be swallowed!).

When Samuel was bored with the rice, we switched over to a bowl of sand with the same concept of burying shells and sea creatures...does it ever get old??? 

Samuel is also a little book worm, so the books are great for discussion or for him to look at on his own!

And my photo book isn't finished yet since we have only been back from the beach for a few weeks, but I plan on adding pictures of our beach trip for him to look at.  If you have never been to the beach, you can cut photos from magazines of the sea!  Or let your child cut them, depending on their age and skill set!

Here are a few pictures of our busy box...not everything is shown, but it gives you a good idea! 


Even better, now that my busy box is established I can keep looking to add to it!  Coloring sheets, art projects, and music!!!  It's still a work in progress, but it is great fun!  We pull this box out about once a week!   Great fun for us to play together, or a little break for me to get a couple things done!!!  If anyone has any suggestions to anything else to add, please share!!!

Saturday, October 22, 2011

Toddler Busy Boxes

I am a member of MOPS...Mothers of Preschoolers (http://www.mops.org/) so a lot of the recipes and ideas I've shared from on my blog from my most favorite resource: other mom's!  Tried, tested, tried again, over and over and over again! 

A few weeks ago my MOPS group made busy boxes for the kiddo's!  And these, are by far, the most brilliant idea ever!  First off, I'm a mom who frets...a lot!  I worry if my son watches a lot of TV, that the activities that we do aren't educational enough, that he's not trying new things...so a typical first time mom! I've been assured that by the second one that I'll loosen up some :0)

A busy box is a great concept for any parent who has kids!  They are so great because you can really personalize them for your child and they help with the sanity!  And they, as the name suggests, keeps your child busy!  They also don't have to break your budget!

Toddlers are busy busy busy people!  My son has an attention span of about 5-15 minutes...that is a typical almost 2 year old!  And like many parents, we have tons of toys...and they aren't played with that often!  So after seeing the MOPS busy boxes, I decided to start making my own! I've decided that 10 boxes will be my goal.

The best thing about busy boxes are:

1. They don't have to be fancy...simple might even be better!  So I picked themes that I thought my son would enjoy and be educational.  Thus far we have an ocean box, a shape box, a number box, a letters box, a bug box, a dinosaur box, and a colors box.  I also have two additional items that aren't so much as a theme, but an educational component that works with sensory, dexterity, and colors.  I call them my busy bags because I had to store them in a bag! I also hope to add a transportation, space,  zoo, and a farm box in the future!

2.  You don't have to break the bank!  I sat down and made a list of ideas of what I wanted my boxes to represent (the themes I listed above!).  Then I went through all our toys and books and pulled out any that were relevant! And I had plenty!!!  Then I decided to research some ideas to go with each box.  I joined www.pinterest.com and typed in Toddler Busy Box and was in heaven!!!  So many great ideas out there!  And so many different ways!  I decided on themes...I feel that is better suited for Samuel and what I hoped for us to gain from the boxes.  Other mom's decided the boxes were better used as quiet time/break time so some people made 7 boxes, one for each day of the week.  Some mom's just have travel boxes, or restaurant boxes, or boxes for while they are on the phone.  My friend used her busy box last week while her daughter was sick. The possibilities are endless!!!  Any supplies you don't have, you can get cheap too!  I paid a visit to the dollar tree and was amazed at all the great items I got for such a reasonable price!  As I list my boxes over the next few weeks, i'll also post prices!

3. The idea is that the busy box will keep your toddler, well, busy, and give you a little bit of a break.  You know, break...so you can go to the bathroom without a toddler asking what you are doing or trying to flush the toilet while you are using it!  Or you can cook garlic bread in the oven without little hands trying to help!  Or you can switch out the laundry and throw in another load...at the same time!  Or you can make a doctors appointment without screaming! Or maybe you just need a few minutes to yourself...we all do!  Your toddler only gets the busy box on occasion.  Once or twice a week...that way it seems new to them!  It's also the reason you can make multiples!  Yesterday we just used one...today we did two.  One in the morning and one in the afternoon.  Once again, your boxes your decision!  Here in Maryland, it starts getting cold in October and regular outdoor time might not happen again until March or April!  And there are plenty of rainy days out there too! 

As you can tell, I am a fan of the busy box...and so is my son!  And I feel so much better now that I know his downtime is being used in a way that is fun and somewhat educational.  Trust me, my son watches Nick Jr....he loves Dora!  But I also prefer knowing that if I need to get dinner on the table, that TV isn't my only option for entertainment!

Thursday, October 20, 2011

Crock Pot Baked Apples!

Simple and delicious! Makes 6 baked apples!

Ingredients

1/4 cup brown sugar
1/4 cup walnuts, chopped
2 tablespoons trans-fat free margarine
1 teaspoon cinnamon
6 Gala or Macintosh apples, cored
1/2 cup apple juice or apple cider
2 tablespoons orange liquor (optional)

Directions

Preheat a large crock-pot on high heat and preset it for 3 hours. In a large bowl, mix brown sugar, walnuts, margarine, and cinnamon. Fill the apples with the filling and place them in the crock-pot. Pour in the apple juice or cider and the liquor, if using. Cover and cook 2 1/2 to 3 hours on high heat until the apples are soft and begin to collapse.